
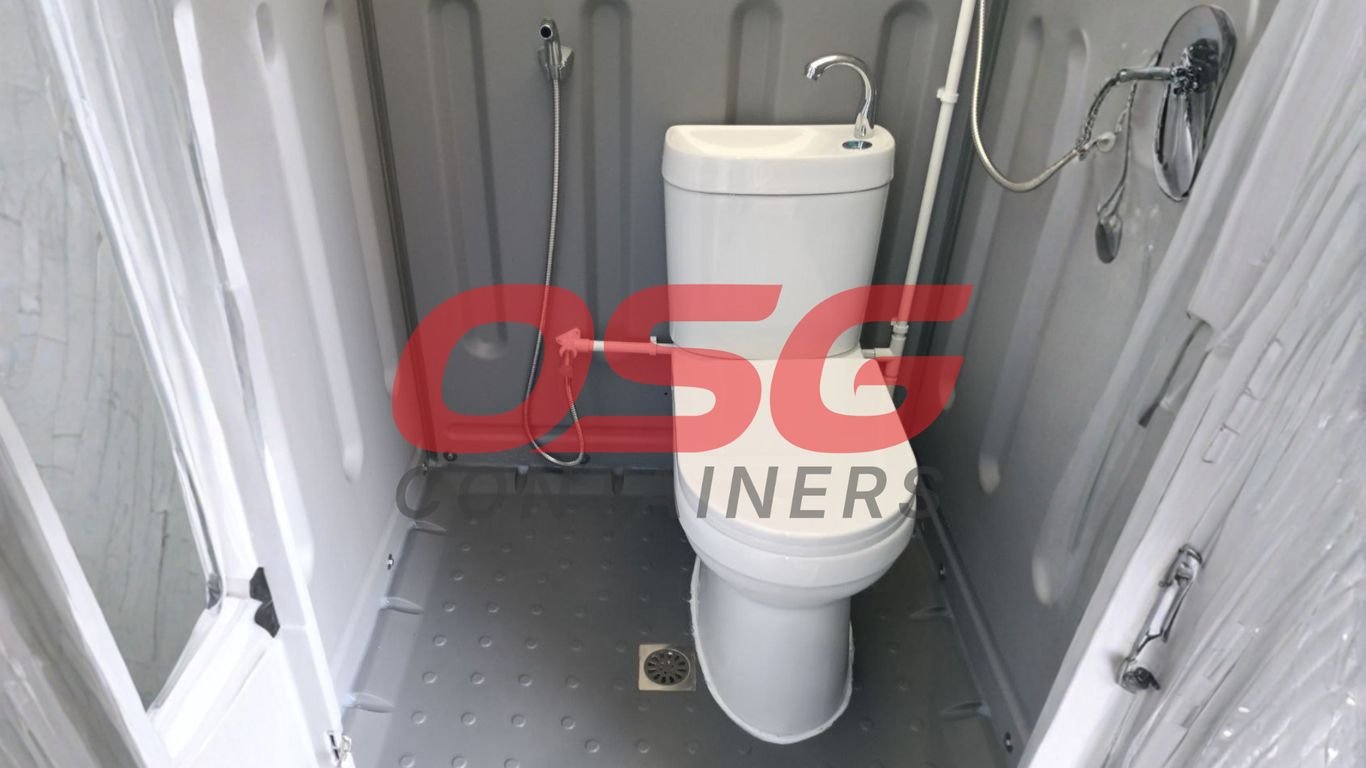
Thinking about putting in a toilet container? It’s a smart move, especially if you’re looking for a more sustainable or off-grid solution. But before you get started, there’s a bit of planning involved. You don’t just slap one in and call it a day. We’re going to break down what you really need to think about, from picking the right bits and bobs to making sure it all works smoothly and stays clean. Let’s get into it.
Key Takeaways
- When picking out your toilet container, think about the materials it’s made from – durable, non-toxic, and easy to clean are best. Also, figure out the right size based on how often you’ll need to empty it. A bigger container means less frequent emptying, but it’ll be heavier.
- Keeping your toilet container clean is super important to avoid smells and yucky stuff. Go for smooth, non-porous surfaces that can handle cleaning agents without getting damaged.
- The look of your toilet container matters, especially if it’s going into your living space. Try to match it to the room’s vibe. You can even get creative with the outside look, just make sure any finishes are eco-friendly and last a while.
- Before you install, prep the site well, especially for good airflow. Make sure the whole toilet container structure is solid and secured. Getting the separating insert and any ventilation systems set up right is key for it to work properly.
- Don’t forget the small but mighty parts! The toilet seat, the separator insert, and the actual waste containers are what make your toilet container function. Double-check everything fits and works before you start using it for real.
Choosing The Right Toilet Container
Picking the right toilet container is a big step when you’re setting up a composting toilet system. It’s not just about having a place to put waste; it’s about making the whole process work smoothly and hygienically. You’ll want to think about a few key things before you commit to a specific model or supplier.
Material Considerations For Your Toilet Container
The material of your toilet container really matters for durability and cleaning. You’re looking for something that can handle regular use without breaking down or becoming a breeding ground for smells. Plastics are common because they’re lightweight and easy to wipe down. Stainless steel is another good option; it’s super tough and doesn’t rust, which is a plus. The goal is a non-porous surface that resists stains and odors.
Determining The Ideal Size For Your Toilet Container
Size is a pretty straightforward calculation, but it’s important. How many people will be using the toilet, and how often? A larger container means you won’t have to empty it as frequently, which can be a real convenience, especially if you’re off-grid or in a remote location. However, remember that a bigger container also means more weight when it’s full, making it harder to handle. It’s a trade-off between emptying frequency and ease of transport.
Here’s a quick guide:
- Single User / Occasional Use: A smaller container (around 5-10 liters) might be sufficient.
- Couple / Regular Use: Consider a medium-sized container (10-20 liters).
- Family / High Traffic: A larger container (20+ liters) will likely be necessary.
Ease Of Emptying Your Toilet Container
This is where things can get messy if you don’t plan ahead. Some toilet containers are designed with removable drawers or buckets that slide out easily. Others might have a simple drain tap for liquids, which is great for the urine side. For solids, you want a system that allows for straightforward removal without too much fuss. Think about how you’ll access the container and what tools or steps are involved. If you’re looking at specific toilet container suppliers, ask them about the emptying process for their models. It’s worth checking out reviews or asking for demonstrations if possible. A poorly designed emptying system can turn a great composting toilet into a chore you dread.
When selecting your toilet container, always picture yourself in the act of emptying it. Is it a simple lift and pour, or does it involve awkward angles and potential spills? The easier it is, the more likely you are to keep up with maintenance, which is key for a successful composting toilet.
Ensuring Hygiene With Your Toilet Container
Keeping your toilet container clean is super important. Nobody wants a smelly or germy situation, right? It’s not just about avoiding bad smells; it’s about making sure everything stays healthy and works the way it should. Regular cleaning practices are the backbone of a well-functioning toilet container system.
Regular Cleaning Practices For Toilet Containers
Think of cleaning your toilet container like any other part of your home that needs regular upkeep. You wouldn’t let your kitchen sink get gross, and the same goes for your toilet.
- Empty Frequently: The urine canister should be emptied often. Fresh urine doesn’t really smell, but let it sit around, and bacteria get involved, which is when the odors start. The solids container can wait a bit longer, as the composting process can begin, but don’t leave it for weeks on end.
- Wipe Down Surfaces: After emptying, give the inside of the containers a quick wipe. This prevents any buildup from starting.
- Deep Clean Periodically: Set aside time for a more thorough scrub. This usually involves taking things apart a bit more and using cleaning agents.
Selecting Smooth, Non-Porous Surfaces
When you’re picking out or building your toilet container, pay attention to what it’s made of. Surfaces that are super smooth and don’t have tiny holes are way easier to clean. Think about it: dirt and germs have fewer places to hide.
- Plastic: Many containers are made from sturdy plastics. Look for ones that feel solid and don’t have a rough texture.
- Stainless Steel: This is another great option. It’s tough, doesn’t rust easily, and is generally very smooth.
- Avoid Rough Wood (Inside): While wood can look nice on the outside, the inside surfaces that come into contact with waste should ideally be sealed or made of a non-porous material.
Using Appropriate Cleaning Agents For Durability
What you use to clean matters. You want something that gets the job done without wrecking your container. Harsh chemicals might seem like a good idea, but they can actually damage the material over time, making it harder to clean later on.
- Vinegar or Citric Acid (Diluted): These are often recommended. They help break down buildup and kill some bacteria without being too aggressive.
- Specialized Cleaners: There are cleaning products made specifically for composting toilets. These often use things like active microorganisms and are designed to be effective and safe for the materials.
- Water: Don’t underestimate the power of good old water, especially when combined with a brush or cloth.
Keeping your toilet container clean isn’t just about appearances; it’s a key part of making sure the whole system works efficiently and without unpleasant surprises. A little bit of regular attention goes a long way in preventing bigger problems down the line.
Design And Integration Of Your Toilet Container
So, you’ve picked out the basic structure for your toilet container, but now comes the fun part: making it look good and fit in. It’s not just about function, right? You want it to blend with your space, whether that’s a cozy camper van, a rustic garden shed, or a sleek tiny home. Thinking about the overall aesthetic from the start will save you headaches later.
Matching The Toilet Container To Your Space’s Ambiance
This is where you get to be a bit of an interior designer. Consider the existing vibe of the area where the toilet will live. Is it modern and minimalist? Or more of a natural, woodsy feel? You can achieve different looks by how you finish the exterior. For a clean, modern look, a simple painted finish in a neutral color might work best. If you’re going for a more rustic feel, natural wood finishes or even some decorative carvings could be just the ticket. It’s all about making it feel like a natural extension of the room, not just a bolted-on necessity.
Customizing The Exterior Appearance
Once you have a general direction, you can really start to personalize. Think about paints, stains, or even decorative elements. If you’re painting, consider using durable, low-VOC paints to keep the air quality good. Stains can bring out the natural beauty of wood. Some folks even get creative with stencils or decoupage. Just remember, whatever you choose, it needs to hold up to use and potentially moisture. A good sealant is usually a smart move, especially if it’s in a more humid environment.
Considering Environmental Compatibility Of Finishes
This is a big one, especially if you’re concerned about the environment or indoor air quality. When you’re choosing paints, varnishes, or sealants, take a peek at the labels. Look for products that are water-based or have low volatile organic compounds (VOCs). These are generally better for your health and the planet. Also, think about durability. A finish that lasts longer means you won’t have to reapply it as often, which is both convenient and more eco-friendly in the long run. It’s a balance between looking good and doing good.
Here’s a quick rundown of finish options:
- Paint: Offers a wide color range, good for hiding imperfections. Choose low-VOC options.
- Stain: Highlights natural wood grain, good for a rustic or natural look. Requires a sealant.
- Varnish/Sealant: Provides protection against moisture and wear. Polyurethane or marine varnish are durable choices.
- Natural Oils: Like tung oil or linseed oil, these penetrate the wood and offer a natural look and feel. Need regular reapplication.
When selecting finishes, always consider how they will interact with potential moisture and cleaning agents. A finish that looks great initially might degrade quickly if it’s not suited for the environment or if it reacts poorly with cleaning products. Durability and ease of maintenance should be as high a priority as the visual appeal.
Installation Planning For Your Toilet Container
Alright, so you’ve picked out your toilet container, maybe even a cool shipping container toilet shower setup, and now it’s time to get it all put together. This part needs a bit of thought, so let’s break it down.
Site Preparation For Optimal Ventilation
First things first, where is this thing going to live? You can’t just plop it anywhere. The spot needs to be level and stable, that’s a given for safety. But more importantly, you need good airflow. Think about ventilation right from the start to keep things fresh and stop any dampness from setting in. If it’s going in a shed or a small cabin, make sure there’s a way for air to move in and out. This isn’t just about comfort; it helps keep the whole structure sound.
Securing The Toilet Container Structure
Once you’ve got your spot picked out, you need to make sure your toilet container isn’t going anywhere. This is especially true if you’re dealing with something like a converted shipping container. You’ll want to anchor it down properly. This might involve bolting it to a concrete pad or using ground anchors, depending on your setup and local conditions. A wobbly toilet is no fun, and neither is a toilet container that shifts in the wind.
Integrating The Separating Insert Correctly
This is where the magic happens for a composting toilet. The separating insert is what directs liquids and solids to their proper places. Getting this lined up right is key. If you bought a pre-made insert, follow the manufacturer’s instructions. If you’re building your own, measure twice, cut once. It needs to fit snugly against the container walls and align perfectly with your collection bins. A poor fit here means things won’t separate as they should, leading to messes and smells.
Ventilation System Installation
We touched on ventilation earlier, but this is about the active system. Most composting toilets need some kind of vent to get odors out. This usually involves a pipe or a fan that pulls air from the solids compartment and vents it outside. You’ll need to figure out where this vent pipe will run and how to seal it properly where it exits the container. If you’re using a fan, you’ll also need to consider how to power it. Proper ventilation is probably the single most important factor in keeping your composting toilet from smelling.
Here’s a quick rundown of what to think about:
- Airflow In: Where will fresh air come from?
- Airflow Out: How will stale air and odors be removed?
- Fan Power: If using a fan, how will it be powered?
- Sealing: Make sure all connections are airtight to prevent leaks.
Planning your installation carefully now will save you a lot of headaches later. Think about how everything connects and where it all goes before you start drilling or screwing things in. It’s better to have a solid plan than to be fixing mistakes down the line.
Essential Components For Your Toilet Container Setup
Alright, let’s talk about the bits and pieces that actually make your toilet container work. It’s not just a box, you know? There are a few key players here that make all the difference in how well it functions and how comfortable it is to use. Getting these right from the start saves a lot of headaches later on.
Selecting The Appropriate Toilet Seat
This might seem obvious, but the toilet seat is more than just a place to sit. You’ve got options here. You could totally build your own wooden seat and lid, attaching it with hinges. It’s a bit more hands-on, sure, but it lets you customize the look. On the flip side, buying a pre-made seat can be a real time-saver, and you might even get fancy features like a soft-close lid, which is pretty nice.
Choosing The Right Separator Insert
This is kind of the heart of the whole operation for a dry toilet. The separator insert is what keeps the liquids and solids apart, which is super important for the composting process and keeping things from getting smelly. They come in different materials, like plastic, ceramic, or even stainless steel. The main thing is that it fits snugly into your setup and does its job of separating cleanly. If it doesn’t line up right or the separation isn’t smooth, you’ll have problems.
Understanding The Role Of The Toilet Container
Finally, we have the actual containers themselves. You’ll need one for liquids (urine) and one for solids. These need to be made of something durable and easy to clean, like sturdy plastic or stainless steel. Think about how you’ll empty them – some pull out from the front, others might have a drain tap, or you might need to remove a panel. The size matters too; bigger means less frequent emptying, but also heavier loads. Make sure whatever you choose is practical for your space and your strength.
Pre-Installation Checks For Your Toilet Container
Alright, so you’ve gone through all the steps, picked out your materials, and you’re ready to put this thing together. But hold on a sec! Before you get too excited and start screwing things in, there are a few little checks that can save you a heap of trouble later on. Think of it like double-checking your recipe before you bake a cake – you don’t want any surprises when it’s too late to fix them.
Testing Functionality Before First Use
This is a big one. You really want to make sure everything works as it should before you actually need to use it. It’s not the most glamorous part, but it’s super important. You don’t want to discover a leak or a blockage when nature is calling urgently. So, what does this actually involve? Well, it means giving all the moving parts a good once-over. If you have a flap or a seal, test that it opens and closes smoothly. If there’s a connection for a urine hose, make sure it’s snug and doesn’t look like it’ll pop off.
Aligning The Urine Canister Properly
This is a common sticking point for a lot of people. The urine canister needs to be perfectly positioned so that the separator insert directs everything into it without any spillage. If it’s even a little bit off, you’re going to have a mess. Take a moment to look at how the separator is angled and where the opening for the urine is. Then, place the canister so that the opening lines up exactly. Sometimes, you might need to adjust the canister’s position slightly. It’s all about getting that flow just right.
Ensuring Proper Fit Of All Components
This is where you just go around and give everything a gentle wiggle. Does the toilet seat feel secure? Is the separator insert sitting snugly in place, or is it wobbling around? Are the main containers fitting into their spots without too much force or leaving huge gaps? You want everything to feel solid and well-connected. If something feels loose, now’s the time to figure out why. Maybe a screw needs tightening, or perhaps a piece isn’t quite seated correctly. It’s better to fix these little things now than to deal with them when the toilet is in use.
Remember, a little bit of patience during these final checks can prevent a lot of headaches down the road. It’s about making sure your new toilet is not just assembled, but assembled correctly and ready for action.
Wrapping It Up
So, you’ve thought about building your own composting toilet. It’s definitely a project that takes some brainpower and effort, but the payoff can be pretty great – a toilet that’s exactly how you want it and good for the planet. Just remember to really plan things out. Think about the containers, how it’ll look, and how you’ll actually put it all together. Get your materials and tools ready beforehand so you’re not running to the store mid-build. A little bit of careful work now means you’ll have a solid, custom toilet that you can be proud of for a long time. It’s not just about having a place to go; it’s about building something that works for you and your space.
Frequently Asked Questions
What materials are best for my toilet’s waste containers?
For your toilet’s waste containers, it’s best to pick materials that are tough, safe to use, and easy to clean. Things like sturdy plastic or stainless steel work really well. They hold up over time and don’t get gross easily.
How big should my toilet containers be?
The size of your containers really depends on how much you’ll use the toilet and how often you want to empty it. Bigger containers mean you won’t have to empty them as much, but they also take up more room and get heavy when full.
What’s the easiest way to empty and clean the containers?
Look for containers that are simple to remove and empty. Some toilets have bins you can pull out from the front, while others might have a drain for liquids or a way to lift them out from the top. Easy access makes cleaning much less of a chore.
How do I keep my toilet container clean and odor-free?
Regular cleaning is key! Aim for containers with smooth surfaces that are simple to wipe down. Using cleaning products that won’t damage the material, like diluted citric or acetic acid, helps keep things fresh and prevents smells and bacteria.
What should I consider for the toilet’s appearance?
Think about how the toilet will look in its new spot. You can decorate it to match your style, whether that’s simple and plain, painted, or even carved. Just make sure any paints or finishes you use are safe for the environment and will last.
What are the most important parts to check before I start using my new toilet?
Before you use your homemade toilet for the first time, double-check that everything is working right. Make sure the part that separates liquids and solids is lined up correctly, and that all the pieces, especially the urine container, fit snugly and are ready to go.